Top tips and strategies for Hell: Fight for Gilrand
The devil's in the details
One of the reasons that Hell won our Silver Award is because it manages the rare feat of being both approachable and challenging.
The easy tap-driven interface and fantasy theme hide a strategy game of surprising depth. Even the first scenario on the easiest setting will prove a challenge for the unprepared.
So we're here to help you get prepared, with a quick guide to surviving the inferno.
RTFMIt might seem an obvious place to start, but the first thing you need to do is to read the manual.
And it's not all that obvious. The game encourages you to sit through a tutorial, but that only offers an introduction to how the game works. Plus, developer Hunted Cow has hidden the manual under the "online help" option in the menu.
That means it's online, so you can download it yourself too.
It's aimed at the PC version of the game. But in it you'll also find an explanation of what all the unit stats are, how they effect the game, and what all the unit special powers do. The tutorial covers none of this, and it's essential knowledge for success.
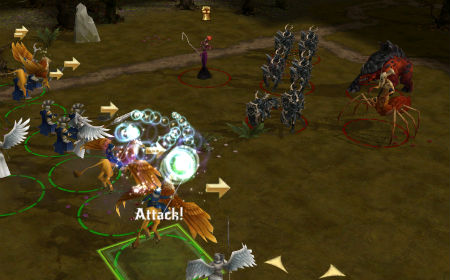
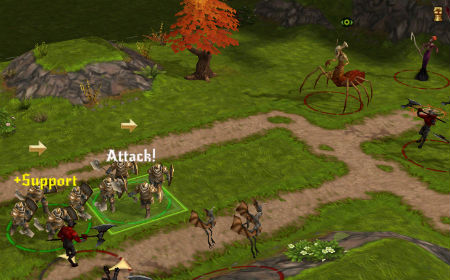
Mutual supportWhat the tutorial does cover is the idea of supporting and flanking units. A diagram in the manual makes it even more clear. Essentially, friendly units adjacent to an attacking unit can grant that unit a combat bonus, if they themselves are not opposed.
Making the most of this is necessary if you want to win. In practice it means making sure your melee units stay in lines, facing the enemy. If that means moving at the speed of your slowest unit, so be it.
You'll often be fighting on more than one front, so you can make up identikit battle lines for each.
The game makes it as hard as possible to achieve this in practice. It throws gates and bridges into the terrain to break up your formations. It has the demons throw missiles and spells at you that cause units to flee. It sets turn limits on the scenarios to stop you fannying about re-positioning units all the time.
Knowing when you can abandon formation and pile in is something that comes with experience. But as a general rule, the earlier in the scenario, the more important it is to stick together. As time wears on and the number of enemy on the board decreases, it becomes safer to take risks and split your soldiers.
Devils in the distanceBut melee units are only half the story. As well as your trusty knights and soldiers you have bowmen, siege engines and wizards too.
Most of these unit types are rubbish in combat, so keep them away from your front lines. One step behind your advancing troops is a good place, making sure they're well placed to soften up enemies before hand to hand combat.
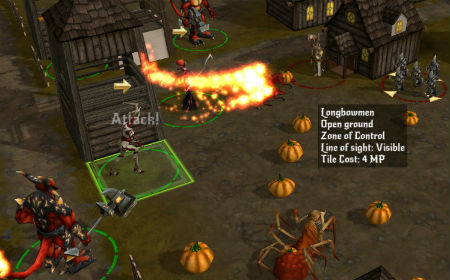
Range is a factor. It's easier to shoot at closer enemies, a fact reflected in the "to hit" percentages the game gives you in a handy popup.
So while it's tempting to throw everything at the nearest targets, like most things in Hell it's rarely as simple as it seems. It's better to kill units than to wound them, for instance, because wounded units still attack at full strength. Missile fire is great for that particular job.
Plus, the demons have easy access to flying troops. The Order of Radiance has some, but they're much more expensive. So it's far more cost-effective to take out winged units over impassable terrain like rivers by using ranged shots.
There's also the matter of cover. Units in woods and buildings, or behind walls, get a bonus when defending against ranged attacks. Coversely, firing units get a bonus when attacking from elevated positions. So hills next to open ground are a great place to put missile troops.
Remember that when selecting targets. And, since most demonic units have a ranged attack, when positioning radiant units too.
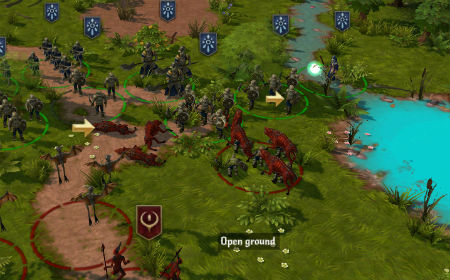
Don't maneuverWith its relentless focus on positioning, the tutorial also skips over the matter of zones of control. All this means is that moving into one of the squares next to an enemy takes all of your remaining movement allowance for the turn.
It also mentions in passing the idea of a maneuver, and this is an important concept. It's just a fancy name for moving from one zone of control to another. But here's the thing: you should never do this. Doing so not only risks you not moving at all, as the unit has to pass a stat test first, but costs one of your attacks.
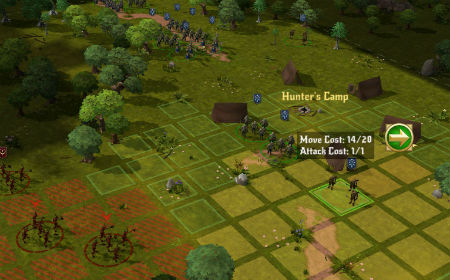
Many units only have one attack per turn, so this is a big deal. And it's rare that it's truly necessary to maneuver, even in the service of keeping formation. Better to stay where you are and punch as hard as possible.
Thankfully, you get a warning before attempting a maneuver: the solid green arrow for a move action changes to a broken red one.
Awesome abilitiesWhen you're devoting so much time and energy to keeping units in line and in the best terrain, it's easy to forget what they can actually do.
Many units can take more than one action per turn, for instance. If you are going to maneuver, it's wise to select something that can still attack afterwards, for instance.
Most troop types can do something other than the basic attack. Charging, for instance, which is a movement followed by an attack, gives you a helpful melee bonus. But you'll need to be the right distance from the target to use it. So steady your advance so that you're the one charging rather than being charged.
It's not just about the fights, either. Lots of troops have the ability to buff friends or stymie enemies. In lots of strategy games, these sorts of effects can be ignored in favour in good old-fashioned bloodshed. But since combat tests in Hell are conducated on the roll of two digital six sided dice, the one or two point differences they make can have a big impact.
Perhaps the most useful abilities of all, however, are healing ones. Although it might seem better to finish off an enemy rather than healing up a friend, Hell's experience system means its useful to preserve units. If you can keep them alive and kill enemies they gain in level and get super-useful inbuilt buffs.
The fact there's an experience system already in the game makes it more of a mystery as to why interlinked campaign scenarios aren't. Here's hoping for some new campaigns with this feature soon.
