How to sign up for a Japanese PlayStation Network account: part 1
Turning Japanese? I really think so

So you’ve read through our exhaustive coverage of Sony’s shiny new PSPgo console, you’ve weighed up the pros and cons of making a purchase, and you've decided to take the plunge into the exciting world of digital-download gaming.
Sadly, while the European PlayStation Network Store has its fair share of treats, it only takes a cursory glance at the list of goodies available to Japanese PSP owners to realise that we’re getting a little short-changed when it comes to content.
Thankfully, getting around this issue is relatively easy - with a bit of tinkering, it’s perfectly possible to access both the US and Japanese PlayStation Network Stores and sample what Europe is currently missing out on.
In this guide, we’ll be showing you how to sign up for the trickier of the two choices - the Japanese store.
.gif)
Download Sony’s free MediaGo software from here. Install it and click on the PlayStation Store icon on the left-hand side of the screen. Click the sign-in icon and you’ll be presented with the following pop-up window.
Because we’re creating a new Japanese account, you’ll obviously need to select the “Create New Account” option.

.gif)
This screen gives you a run-down of what kind of information you’ll need to provide. You can check out the privacy policy - if that’s the kind of thing that floats your boat - but otherwise you’ll want to make a beeline to the “Continue” option.

.gif)
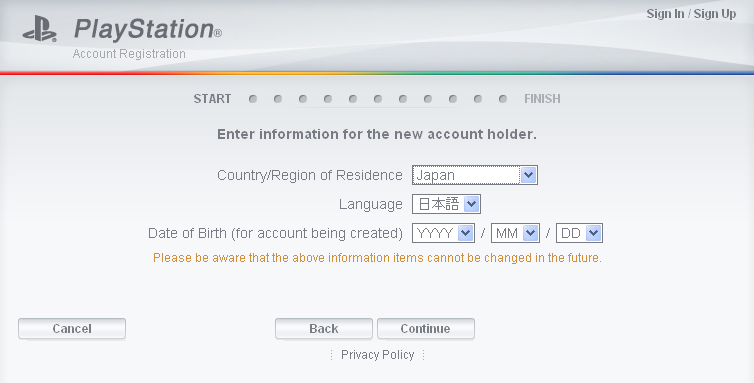
On this screen you’re given the option of selecting which country you’d like to create an account for - select Japan. You’ll also need to input your date of birth at this stage.
.gif)
Hold onto your hats, folks, because from this point onwards all of the on-screen instructions are in Japanese. This screen is basically asking what kind of account you wish to create, and the only option available is “Master Account”. Click the text with the arrow next to it to proceed.

.gif)
What follows is a quick security check to prevent automated sign-ups by naughty-type internet bots. If you’re a genuine human being then this screen shouldn’t present any issues.

.gif)
Right, now onto the really serious stuff. While the layout of this screen is pretty much identical to the Euro and US equivalents, if you don’t know your way around then the range of options can be incredibly daunting.
In the top box, enter a valid email address. It has to be valid as you’ll be sent an activation email later on to complete your registration.
For the second box, insert a password of your choice. The only proviso is that it must be at least six characters in length.
In the third box, re-type your chosen password.
The fourth option allows you to select a question for your password hint, which will enable you to retrieve it later on if you ever forget what it is. It defaults to “My birthplace”, so we’ll leave it at that.
In the fifth and final box you need to enter your password hint (here’s a clue: it’s your birthplace).
Once you’ve done this and clicked the button at the bottom of the screen an email will be sent to the address you just provided. You need to click the link in the email to activate the account.

.gif)
Here you can select your Online ID - or username, if you will. In the interests of keeping things consistent, it’s a good idea to take your existing UK Online ID (assuming you have one) and simply add “Japan” on the end. So if your UK account is Fredbloggs, then your Japanese one will be FredbloggsJapan.

.gif)
This is where you enter your personal and address details. This page might initially seem a little daunting, but it’s actually dead easy to complete.
The top three options are surname, first name and sex. Sadly, in the case of the latter choice, you can’t say “Yes please”. It’s either male (left option) or female (right option).
The section below is for your address. You have to provide a Japanese address here, which is naturally tricky because if you’re reading this guide there’s a fair chance you don’t live in the Land of the Rising Sun. Thankfully, because no checks are made you can insert any Japanese address you like.
You don’t even need the entire address: simply select a random Japanese postal code (usually a seven digit number separated by a dash) and insert it into the third box down and click the button on the right. This will auto-fill the rest of the details. Click the right-hand button at the bottom of the screen to progress.
.jpg)
.gif)
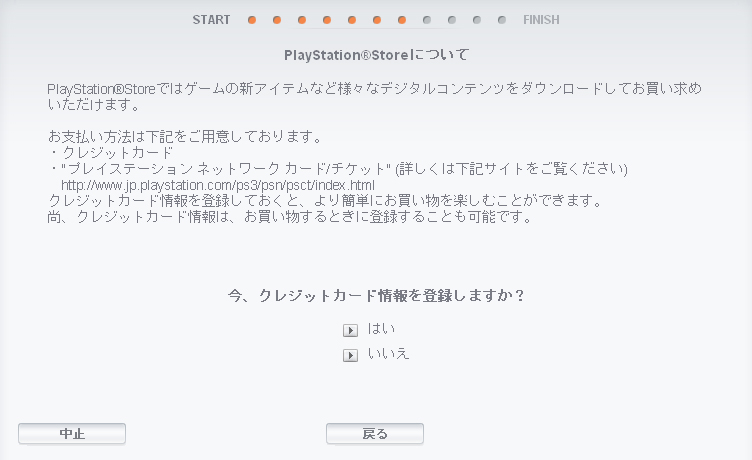
Here you can add credit card details, but because people outside of Japan can’t register their cards on the Japanese PSN Store, it’s a page you’ll want to ignore. Select the second option.
.gif)
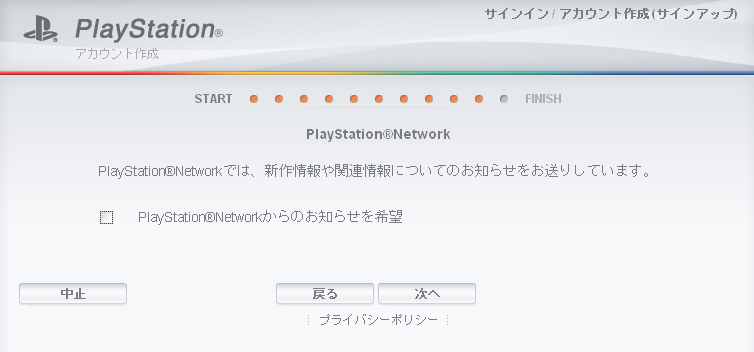
Here you can specify if you wish to receive the Japanese PSN newsletter. Unless you like getting emails that are in a totally incomprehensible foreign language, leave the check box blank and click right-hand button to proceed to the next screen.
.gif)
We’re there! This is the Summary screen. Check the details are correct and click the right-hand choice to complete your registration.
You’re now the proud owner of a Japanese PlayStation Network account, and you can browse the store for demos and other free items. To actually buy something you’ll need to invest in a Japanese PSN points card - which we'll cover in part two of this guide.

